Affichage des articles dont le libellé est Work in Progress. Afficher tous les articles

vendredi 29 mars 2013

Spring

Spring is here! We have had amazing weather here in Vancouver BC, with temperatures unusually warm for the season...Unfortunately that means this baby, which is still sitting unfinished on my dress form, probably won't see any action until next winter - no biggie, story of my sewing life...

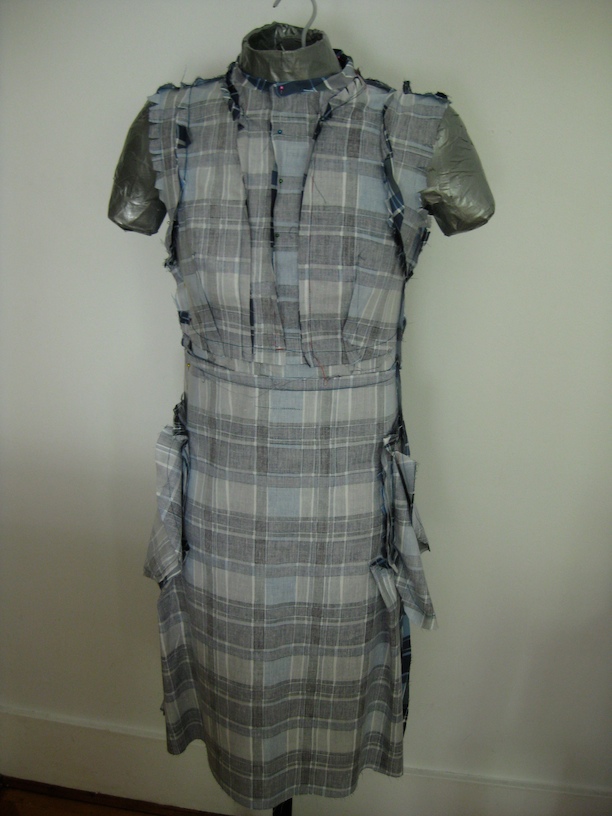
One of the reasons that it's been left untouched for so long (I started it in early february if I recall correctly), is because I have been busy with this guy:


I know, it doesn't look like much...This might give you a better idea:


Kylie Minogue - Can't Get You Out of My Head from Sonny London on Vimeo.

Yup, I'm making the white jumpsuit from Kylie Minogue's 2001 video of Can't Get you Out of My Head...It's not actually for me: a woman that I work with is going to a "White Party" next week and she asked me a little while back if I would make it for her.

Now, I don't usually make clothes for other people, but this sounded like a pretty fun project and not overly complicated. So this is obviously the muslin, the final fabric (a crisp white lycra-bamboo blend knit) is all cut up and will be all sewn up before the week-end is over.

It was fun to make as I basically had to piece together the top, altered from one pattern, the bottom copied from a pair of pants she owns and the hood/cowl, traced from another pattern and redrafted.

I'll share more details on the pattern pieces soon, and hopefully will get a picture of the final garment...

After that, once the fur vest is done (and put away), I want to finish a button-down shirt I started a few months ago, get started on a muslin for a pair of linen pants I've had in mind for quite a while now, and possibly knock off this pretty Tibi top using this equally pretty cotton voile found at Dressew last week.

source: The Glamourai

In other totally unrelated news, I got these babies today:


My first pair of skis! Can't wait for next season to ride them out!

dimanche 3 février 2013

WIP: Playing with (Faux) Fur

 Here's a sneak peek at my latest take on the current pink fur trend:

The picture really doesn't do justice to the brightness and softness of this fur
I've been totally inspired by this Versace number and it so happens that I recently managed to get my hands on some (free) left over hot pink fun fur. It was a sign: I had to go bold for my next project, and so, I am.....


Just kidding.


Although I do admire anybody who can pull off something like that and make it work as a fashion statement, (like this lady) I don't think it's quite...me.

So the truth is, I've been working out the muslin for the fur vest in this pattern:


Why bother making a muslin, you ask, it's a loose fitting vest?...Well...Exactly.

It's the only pattern I could find that somewhat resembled the vest I have in mind, but I didn't want to end-up with a boxy, shapeless garment, especially for 40 bucks worth of faux-fur...

So I made a muslin and I'm glad I did.

The back was WAYYY too big. I didn't want to add darts as I was afraid they would create to much bulk. So after playing around and pinning extra fabric here and there, I actually ended up with princess seams.

The back was big enough that I managed to recut all the pieces from that one original piece

The front was pretty straight forward at first. I pinned a horizontal tuck of about 2.5cm above the bust and did a SBA. After that I still had extra fabric at the armhole that looked like it wanted to become a dart. I tried pinning said dart and rotating it to the side seam instead of the armhole but that was a fail (haven't had much luck with rotating darts in the front so far....). So next I tried lowering the armhole, and as I was about to recut a muslin of the front, I remembered that I did, in fact, have some (free) left over pink fun fur from a recent stuffed animal project, so I cut my new front in it.

Once sewn up, the extra fabric and armhole gap were still there but it didn't look as bad as on the cotton muslin. I managed to remove the excess almost completely by doing a sloping shoulder adjustment and taking in a bit at the front side seam just under the armhole.

I'm really glad I had the opportunity to try the adjusted pattern on the fun fur. It worked out great as the nap of the pink fur is pretty similar to that of the faux-fur I'm planning on using (i.e fairly long), so I can expect this to be quite accurate with what the final garment will look like. Also, I wasn't sure if the flaws showing on the cotton muslin would show more with the fur (due to thickness) or less or the same, and now I have my answer: small wrinkles definitely show less, thanks to the thickness, and although main flaws are just as obvious, it was easier to find a satisfying fix with the fur rather than spending more time tweaking the regular muslin.

I've made all the adjustments to the pattern now and I can't wait to actually cut into my faux-fur...

lundi 18 juin 2012

WIP: Piping

After a bunch of muslins, I'm finally back to sewing "real" fabric! And playing with contrasting piping on this next project...


This shouldn't take me too long (famous last words...)


samedi 3 décembre 2011

WIP: I might actually finish something by the end of the year...

...or will I ?

I haven't blogged in months, but I have been doing some sewing.
This is what is currently on my table/dressform:

This jacket, that was in my sewing cue for the longest time. I made a muslin back in May and then waited all summer to finish altering it.


The reason it's still sitting here unfinished is that I haven't been able to find the right ribbon to finish the neckline and zipper side. Aside from black, white, grey and the occasionnal bright pink or yellow, none of the fabric stores I go to have the right color ribbon to match my fabric. So I'm resolved to finding the right stuff online...

In the meantime, I started my "7o's skirt" as I'm now calling it. Also muslined back in the spring, I finally took my fabric to the dry-cleaner to get it steam-shrunk. I didn't think to actual measure before and after so I'll just have to trust that it worked...
The skirt is actually further along than this photo as I've put all the fabric pieces together, as well as the waistband part of the lining and I'm soon moving on to adding boning. The construction is pretty easy but I think it's the finishing touches that will make or break this skirt (and might stall its progress too)...


And finally....I also started knitting! Some of the bloggers I follow not only sew but also knit and I have seen some very inspiring projects (this french blog in particular).

What also helped is that I joined a group of women at work who get together at lunch on Mondays to knit! A great way to get advice and support when you're just starting! So after a pair of mittens (or should I say a couple rectangles of stockinette stitch), I dove into this pattern, which isn't complicated, but I'm knitting with 3.75 mm needles and sockweight yarn...so it's taking a long time...


And that's what I've been up to thiese past few months. I'm hoping to get at least one of these projects finished by christmas but I can't promise anything :)


vendredi 25 mars 2011

WIP: a spring blouse

You know how I used to wish I had more time to sew?
Well..it actually happened. And I mean in a good way. I started a new job a month ago. I went from 12hour days with a 1/2hour commute to a nice 9-6, 8 blocks away from my apartment...(not to mention the job actually has more career potential)

I'm loving it. I actually go home and still have energy to sit down and sew. I have time to sew before I have to think about dinner. I even have energy to sew after dinner...

So I have been sewing almost every day since last week-end!
Here is a sneak peak of my current project, a spring Pendrell blouse in a colorful flowerish print bought recently.


I have the sleeves to attach then the side seams and then I'm done.

samedi 26 février 2011

Simplicity 6580: moving on (for now)

Ok, so after Muslin #3, I've decided that I'm going to let go of this one (for now). Muslin #3, which I made in actual muslin fabric, still has lots of fitting problems, if not more than the previous one. I won't go into the details of what I modified, but I probably did it wrong. Plus the fabric is much stiffer and has no strech, while the previous one was drapier and stretchy, which ultimately means that I don't know where to go from here.


Obviously I could try a fourth muslin based on the fit of this recent one but frankly, at this point, if I'm going to spend another 4 hours sewing, I'd like to end up with something I'm actually going to wear.
Sooo, I've decided to put that one on the side for now and do something else, and maybe come back to it later with fresher eyes (and fresher mojo) and try it again.

Having updated my "sewing log" for the spring, and with all my recent pattern and fabric acquisitions I'm certainly note short of potential projects, not to mention a couple refashion ideas for which I've been collecting inspiration on my Pinterest board.

So what's up next ? Something easy that won't require complicated fitting adjustments and a lot of detailed work...


mardi 1 février 2011

Simplicity 6580: Muslin #2

This is Muslin #2 of my Simplicity Jacket.
I was pretty bummed out after muslin #1 and wasn't sure what to do to improve the fit. But after much researching and a little help from fellow sewists (thanks to all of you who gave me their advice on this blog, the Bursdastyle discussion group AND the Pattern Review message board !) I've now come to this second version.
It still needs quite a few adjustments, but I feel like I'm definitely on the right track. When I put this second muslin on, it felt right away much better than the first one, and it gives me hope for the next muslin, which hopefully will be the last.

So here's what I did:

First I corrected the back width by doing a narrow back adjustment.


I drew two lines perpendicular to the grainline: one 1"below the armhole and one in the middle of the armhole. Then I drew a line parallel to the grainline and starting at the middle of the shoulder seam. I cut out the piece...


...and slid it closer to the CB seam, overlaping by 5/8".


Then I redrafted the armhole seam while shortening the shoulder seam ( I actually went back to the original pattern length, which I'd mistakingly lengthened before), and recut the seam allowances.

After I modified the back pattern, I altered the pieces of muslin #1 the same way and reattached the front and back together to see the difference. I added a 1/2" shoulder pad on the right side and a 3/8" on the left, as my right shoulder tends to slope more. Right away it made a huge difference with the way the front hung.

Then I modified the front pattern:
My main issue was to get rid of the excess fabric at the bust. I didn't want to do a sba, because I didn't want to shorten the bust, I actually needed to lengthen it instead. Someone suggested that I do a "narrow bust" adjustment in the front, which is pretty much the same technique as for the back. So I removed 5/8" of width that way.


Then I lengthened the upper bust by adding 1" below the armhole.
At first I wasn't sure about this modification, as I couldn't find an actual example of a pattern alteration like this in any book/website I read. And the "shorten/lengthen" line on the pattern seem to usually be below the bust, not above. But I eventually ended up on this post, where a reader had apparently modified an empire waistline being too high by adding length to the upper part of the bust. So that's what I did, and of course I altered the back the same way.


Then I recut new back and upper front pieces ( I didn't make any alterations to the lower front piece), and put muslin #2 together with the shoulder pads.

Here is what it looks like now:


I am much happier with the front. At first I found the bust to be a tad bit too long, but I corrected it by taking in at the shoulder seams to raise the bust line just enough. The left side is still drooping a bit so I will probably do a minor sloping shoulder alteration on that side as well.
The bottom part of the jacket looks fine. I actually like the length as it is now, unhemmed, so I will add another 1" to 1-1/2" below the bust to keep it that way.


There is still some excess fabric at the bust, so I will probably make another "narrow bust" alteration of an additional 5/8" or so. Plus I think I will get rid of some of the gathering and take in at the side seam instead.


The bottom back looks fine, but the upper back is still too wide, so same as for the front, I will do a "narrower" back alteration.
On the profile picture you can also see that there is too much ease for the "round of the back". I read somewhere you can solve that by taking in at the CB seam and tapering down.
Here's what it looks like if I pin out the excess:


There's probably a middle ground to be found between this and the narrow back alteration.

So, I still have a lot of work on this, but to be honnest, I am actually enjoying this whole process. It's the first time that I have had to make that many alterations to a garment and though it is quite a long process, it's actually quite interesting and I'm learning a lot.
I haven't done anything to the sleeves yet, I want to get the bodice perfect first and then I'll try and make the perfect sleeves for it. Did I mention I also intend to line this jacket ?


mardi 18 janvier 2011

Work in Progress: A muslin for Simplicity 6580

I cut out and assembled the pieces of the muslin for my Simplicity 6580 jacket.
Well, let's just say that it needs quite a few fitting adjustments, unfortunately I'm not at all sure how to proceed.

Let's start with the pattern. It came in two sizes: 7JP and 9JP. I'm not really familiar with these sizes. Is it the equivalent of a Burda "petite" size ? Not sure.
The chart on the envelope allows you to compare the standard measurements to the "Misses" sizes. the 9JP is closest to the Misses size 10 (which is closest to my measurements), when it comes to standard measurements anyway, so that's what I decided to cut.


You'll notice that while waist measurement is the same for 9JP and 10, bust measurment is 1/2" bigger in the "junior Petite" size, while hip measurement in 1/2" bigger in Misses size. The back neck-to-waist size is considerably shorter in the petite size, which makes sense...

Before I cut the muslin fabric, I added 1" to the total length, as well as 1/2" to the shoulder length, as, based on my own measurements, it seamed like the pattern would be a bit tight. I also added a center seam in the back, instead of cutting the piece on the fold, to facilitate additional fitting adjustments.


So once the pieces were sewn together, this is what it looks like:


Yuk, not quite the nice fitted look of the envelope. It's too big, obviously, and still a bit short I think. The added shoulder length was a mistake, but it's easy to cut back out. I'll probably have to make a narrow back adjustment, and maybe take in on the sides while reducing the back darts.


The sleeve is obviously too short (which is often my case, with my freakishly long arms...), but thanks to the elbow mark and shortening/lenghtening lines on the pattern, I should be able to fix that. I might reduce the curve of the shoulder top, it is very puffy as it is (it doesn't really show on the photos), but this may be due to the shoulder seam being too long and the sleeve cap sitting too low...


As for the front, I'm not sure what to do. There are no apex mark to help figure out how to improve the bust fitting, and since I'm not dealing with darts or princess seams, I'm kind of lost. Should I diminish the gathers and take in on the sides ? If I do, won't that move the neck yoke seam to the sides to much (over the apex)? The neckline seams a bit too wide as well, plus you'll notice my uneven shoulders (my right shoulder slops more than my left) which I might just adjust with the proper shoulder-padding.

In fact this has me wondering if I should have gone with the smaller size, while just adding more overall length (1" isn't enough I think) and adjusting the sleeves...

So far I haven't had a project with that much adjustment needed, I have my trusty "Fit for Real People", and I also got "the Perfect Fit" from the library, so these should help me figure some of it out...But I'll also take any advice anyone might have !

dimanche 1 août 2010

Project update: the New Job Dress

It's been 3 weeks since my last post !
As I mentionned last, I started a new job which has me working close to 12 hours a day, plus we have relatives visiting from France so I've had absolutely no time to do any sewing, let alone bloging. I'm even behind on reading my blog roll and the number keps getting higher on my netnewswire widget...
I was able to catch up a bit the past couple days though, thanks to having Friday off.

So I finally got started on my dress - with the actual fabric this time.
With the muslin I didn't bother cutting the facing pieces or even adding seam allowances. I just traced the pattern onto the fabric and cut around them, adding roughly the same amount all around. so it only took me an hour or so to cut everything.
But this time I had to do it properly. The dress has 12 pattern pieces, 3 of which need to be cut twice for facing, and I also cut the waistband twice so it would be nice and neat on the inside. Then that's 8 pieces that need fusing. Needless to say it took me a good chunk of time to get all my pieces ready (basically all my sewing time on Friday, and a little bit of Saturday morning).
I have only sewed the bodice part so far (with the collar), but I've roughly pinned some of the other pieces together on the dress for to see what it would look like:


I think it looks pretty promising ! Hopefully I can finish it before summer is over ...

dimanche 11 juillet 2010

My first muslin

This week-end I started working on this dress from BWOF April 2008:


After reading through the instructions, I realized this one was a bit more complicated than what I've done before, in terms of construction. I actually have high expectations for this dress, so I wanted to be sure the end result would be up to my hopes.
So friday morning, after attempting a quick tissue-pattern fitting on my dress-form, I decided to make a muslin. Thankfully Gala Fabric is only a few blocks from my house and I was able to pick-up some stretchy nylon (my actual fabric is a stretchy cotton and is a bit heavier, but for $2/m this will do...).

So in a few hours between Friday and Saturday I was able to put it together. I actually went through the trouble of making the pockets. I probably could have just stitched the pocket yoke to the skirt, but I found it a good opportunity to practice, as they were in fact a bit more intricate than I first thought.


I didn't sew any of the facing so the collar doesn't stand as well as it would ultimately, and I omitted the zippers though I might have to put the side one if I want to be able to easily try it on myself. This is also a good opportunity to test my dressform's accuracy.

So now I have to figure out how to alter the pattern to get rid of a few little fit issues...

As usual with Burda patterns, even though I picked the size that matched my measurements for bothe bust and waist, the dress is too wide. Maybe that's meant to be the ease, but this design is supposed to be close-fitting so I don't know...
In this case, I might actually downgrade the waistband and skirt to a 34 (it's a 36 right now), but I'll keep the top a 36 so it doesn't get shorter.


The bodice has a few little problems. For one thing, I think the bust darts come up to high. In Fit for Real People, they say darts usually need to end at least 1" from the apex. In this case, it seems like the design has them finish right on the apex (but I am assuming that from the photos, since Burda patterns, unlike others, don't actually have any markings for the apex on them). I think on my dress form they go a bit higher though...


You might have noticed that the right side is actually smoother than the left. I'm not sure why, I will need to try it on myself to see if it's a construction problem on my part or an accuracy problem on the form. However on both sides there are wrinkles that seem to indicate I have square shoulders. Again according to Fit for Real People this can be fixed easily by raising the seam at the shoulder (while it stays the same at the neck)...


The neck gaps a bit at the back, so I might need to do an horizontal tuck there.

But here is my biggest issue. After pinning about 3/4 of an inch on each side for a tighter fit, this is what the back looks like:


Hello sway back ! Now I'm not sure if I should add darts, and how long to make them, or if I should make an horizontal tuck or raise the waistline seam...Anyone outthere has any suggestion, let me know !

And now this is just a photo of the muslin on the right side, so you get a better idea of the shape whithout the confusing pocket mess ...though the fabric print is quite confusing in itself, you can barely see the pockets even though I obviously didn't bother matching anything...It's quit a good exemple of fabric style not being right for a garment design, as all the interesting details just disappear in the busy print...


So this is where I am right now, not too sure what my next move should be.
I am actually starting a new job tomorrow which will most likely involve long-hour days plus my summer week-end are starting to fill up rather fast, but hopefully I can still find some time in the next few feeks to make the alterations and complete my dress. In the meantime, if anybody out there has suggestions or tips, or thinks I am mistaking on some of the fit issues, I'll be very grateful to have your opinion !

lundi 21 juin 2010

Work in Progress: A stand for my dress form

I finally found a stand for my soon-to-be-made dress form !

Today I first went to Eddie's Hang up display, a store that sells display supplies to retail stores. They have mannequins and stands and I was actually considering the idea of splurging on a $60 stand (wooden base with metal pole) as I want something that will look nicer than a PVC pipe shoved in a x-mas tree stand... I went with B. and he suggested I continue looking a bit into thrift stores before I get one of those. Not that there was anything wrong with them, but like I said, that would be the splurge solution, and I hadn't exhausted all the save solutions yet...

We then went to Dressew to look for fabric for our bedroom curtains. On the way there, we stopped at a small thrift store. I'd seen it before as they always have stuff out on the side walk, but never went in. It's kind of in the bad part of town and it looks a bit dodgy from the outside, but this time I went in and went straight to the back where the bigger furniture seemed to be.
And there I found it, a wooden floor lamp, for $15.99.


The lamp is actually all wired and functional and with a little bit of refinishing and a shade it would look pretty nice. People actually stared at us at Dressew and asked where we got it.
I did hesitate for a minute, thinking maybe it was a shame not to keep it as a lamp. But we don't actually have room or need for any more lamp in our apartment. Plus I figured we don't have to cut it or damage it in any way for it to be my dress form stand, so maybe in the long run, it might become a lamp again....

But for now it's going to be the leg(s) for my new twin...


The bulb mount is screwed on to this little bit of rod at the top. I can probably use it to attach a hanger or some sort of shoulder piece to support the form...I need to do a bit more thinking, though and a trip to the Home Depot should help me figure it out...

After he carried the lamp back home on his bike, jousting style, I've warned B. that he should expect a "duct-tape your girlfriend" workshop in the next few days...

mardi 8 juin 2010

Projects preview

I've been working on two different projects at once, one from the April 2010 issue of BOWF and the other one from July 2008.

The first one is this tulip skirt (style 111 A), which I am making in this fabric from Dressew:


And the second one is Tunic style 108:


and I am using this white flowery fabric:


Hopefully I will be done with either one or both soon !