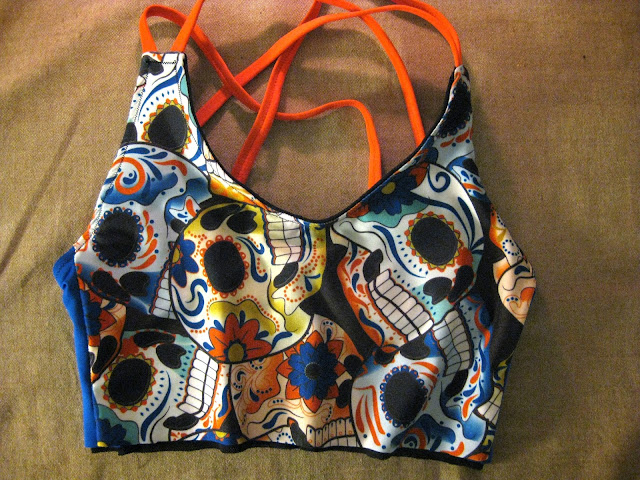
I made Papercut patterns' Pneuma tank (bra version) as part of my outfit for my first trail race in October.
I really liked the strap design and the options between bra and loose tank, but I also wanted to add cups, you know, just to pretend that I had some kind of curves under my shirt...
Anyways, it wasn't that complicated, the tricky part was figuring out how to attach the lining to enclose all the seams. I'm going to try my best here to describe what I did step by step. Apologies for the dark-ish photos, I was sewing all of it at night, hopefully they do make sense.
First, I looked at RTW bra of mine to see how the cups where built in. Turns out they'ré where sandwiched between the lining and another mid-layer of mesh between the lining and the outer layer. This was so that the mesh and lining can be sewn together, creating two seperate "pockets" for the cups to stay in.
So first, I cut three layers of the front: outer layer in main fabric, mid layer in mesh mesh and lining in moisture-wicking polyesther fabric, and two layers of the back (main fabric and polyesther lining)
Note: I used a zigzag stitch for all the seams, and wooly nylon on the bobbin.
These are the cups that I used in the end. I just placed them on top to make sure they would fit. After that you can put them away until it's time to put them in.
Sewing the cups "pockets": Baste the lining and the mesh together along the top, and stitch a line right down the middle. This will prevent the cups from moving around and will keep them each on one side.
I wanted the cups to be removable for washing, so in order to keep an opening, the side seam on the lining layer need to remain open. Trim the seam allowance off on the lining layer, and coverstitch or zig-zag the edge. You'll have to make sure to always keep that edge free, especially when seing the side seams together.
Next, baste the straps to the outer layer.
Then stitch together the outer front and the mesh/lining layers, right
sides together (in the case of the mesh/lining layer, the lining side is now considered the right side) with the straps sandwitched in between. Stitch along the
neckline and accross the straps. Don't stitch across the armscye just yet.
Adding the elastic to the neckline: With the bra still turned inside out, lay the elastic on the mesh layer along the neckline (on the seam allowance), and stitched as per the patterns instruction. Turn your bra back the right away, and you can topstitch the neckline now with a zigzig stitch, or do it later after the rest of the armscye and back are sewn.
Next, moving the inner layer out of the way, attach the outer layer of the back to the front at the side seam, right sides together.
Next, attach the straps to the outer layer of the back. At that point, you should be able to pin them to the back and try the top on to check the length. The pattern calls for 2m of straps so 50cm per strap, but I ended up chopping off about 15cm to get the right length for me. This is the time to figure that out. Once you've determined the right strap length length, you can baste the straps in place on the outer back.
After that, stitch the top of the outer back to the top of the back lining. Your bra should be all inside out at this point, with the straps on the inside and just the excess length poking out. Stitch all around the top of the bra, from one armscye to the other and accross the back. Trim the excess strap.
Keeping your bra inside out, pin the elastic from one armscye to the other accross the back (It looks like this time I laid it on the outer layer instead of the lining, but really the result is the same).
Stitch your elastic as per the patterns instructions. Then turn your bra back the right way and top stitch all along the back and neckline.
Finally, baste all layers together at the bottom and attach the bottom elastic as per the pattern instructions, treating all layers as one.
I tried to figure out a way to have the bottom elastic also hidden between the outer layer and the lining but I couldn't figure it out...It probably would have required some hand stitching somewhere, but since the main fabric gets turned to the inside, the elastic still gets encased in fabric so it's not that big of a deal. I didn't finish the edge of the bottom as the final topstitching of the elastic kind of did the job for me. for a neater finish, you good legnthen the main fabric by 1cm and have that extra length folded over so there's no raw edge showing...
And there you have it! A fully lined sports bra with cup "pockets". Slip your cups in and you're good to go!


Thanks so much for this tutorial. I made the tank version and underlined the bra, but I wanted to figure out how to line it so that the straps were enclosed - now I know!
RépondreSupprimerGreat! I'm glad this can be useful to someone else!
SupprimerI love the clean finish at the top! That lining helps so much, awesome tutorial!
RépondreSupprimerClean finish is definitely what I was going for! thank you
SupprimerGreat job
RépondreSupprimerthank you!
SupprimerWhat a great tutorial! I just reviewed the top on my blog and talked about the struggles with getting great looking finishing with this pattern and Funkbunny pointed me to your tutorial, so I've added a link to it now in my post.
RépondreSupprimerThank you, I'm glad you found it useful! your top looks great by the way. I've had issues with twisting hems on knit pieces (t-shirts as well) myself, I'll have to try the overlocker finish as well.
SupprimerThank you! Thank you!! Thank you!!! I've had my pieces cut out for days and I just kept staring at them trying to figure out how to add lining and cups! I'm about to start sewing, so say a little prayer!!
RépondreSupprimerYou're very welcome! hopefully all these explanations make sense when you're holding your pieces together! Let me know if anything is unclear or missing! Good luck! I would love to see the finished product.
SupprimerGood work ..dressing sense for female in india
RépondreSupprimer